Video: Interviews With The Pros - Jeffrey Honda on Fluorescence Photo and Video
Underwater photographer, Jeff Honda, offers insight on how he shoots his amazing underwater fluorescence videos and photos.
What made you get involved with fluorescence photography/videography?
When I first started underwater photography, I had seen a fluorescence picture underwater that I thought was fake. I have always been a fan of forensics and black lights have always fascinated me. Growing up, I must admit that I had phosphorescent stars plastered to the ceiling and black lights with posters all over my walls. When I found out that you could do this under water, it only seemed natural to follow that curiosity.
Who helped you follow that curiosity?
The moment I got my underwater housing for my camera I signed up for Backscatter’s Digital Shootout. They have been pivotal in developing my underwater photography skills and teaching me about underwater photography in general. While traveling with Backscatter, I met Alex Tyrrell, who had just started shooting fluorescence in the Philippines about the same time I was researching about fluorescence photography. He led me to Nightsea, LLC where I met Dr. Charles Mazel, one of the leading marine biologists in fluorescence. Charlie has been key in supporting and encouraging my passion for this style of photography.

In fluorescence photography, subjects absorb blue light and emit colors that are otherwise not visible in normal light. Canon 7D, Canon 60mm, 1/60th, f6.3, ISO 640.
You do both photography and videos of fluorescence, what made you switch to video?
I just didn’t feel photos were doing this style of photography any justice. When you see the reef under fluorescence lighting it’s like you are on some kind of psychotropic drugs (or so I have been told) and it’s difficult to express to someone what you are seeing. I wanted people to see that. The other major reason was my sons. They love watching my videos! They love the vibrant colors. This excitement fuels me to continue this passion.

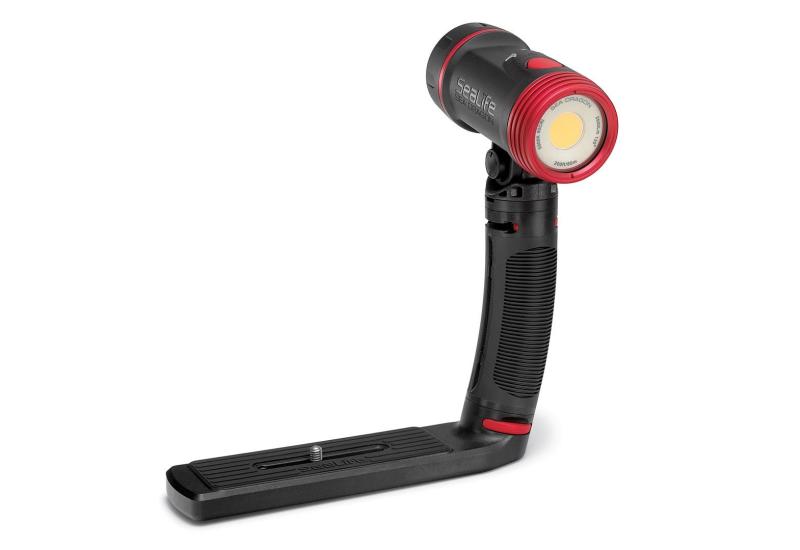
VIDEO SET-UP: A typical fluorescence video set-up will include Light & Motion Sola Nightsea Lights and Yellow Barrier Filters for your lens and dive mask.
Is it hard to do fluorescence under water?
Yes, it is difficult. But, so is hitting a baseball, riding a bike, playing a musical instrument, or even learning how to type for some people. It takes practice like anything worth doing. Even though I had help, I didn’t always have help from someone who shot fluorescence. Five years later, there are a lot more people doing it, trying different things and discovering new ways to shoot. So, it is probably a lot easier now and than it was for me. I am also willing to personally help anyone who wants to learn (as long as time and my kids permit it).
In such a competitive market, wouldn’t sharing your secrets put you at a disadvantage?
Well, sharing was the way I was taught growing up and that is the way Backscatter has taught me in this industry. I figure we (most of us) have the same goal of drawing attention to the ocean with all its beauty, its life, and everything it gives us. I just want to be a cog in the machine that helps slow or stop the destruction of the ocean and to help preserve it for future generations. If my photography, videos, or techniques help spark excitement about the ocean like it does with my sons, then that helps me sleep a little better.
If you can only do fluorescence at night, how does this affect your dive trips?
LOL, it has kept my bar tab a lot smaller that’s for sure! Although I love having drinks with my friends and socializing, I love night diving! Usually, in the morning I am just as chipper as my dive buddies who have been drinking most of the night. It’s not entirely true about shooting fluoro only at night. It is possible that you can shoot fluorescence during the day. It’s a little more difficult, but it is possible through camera settings, depth, and hopefully some cloud cover that you can achieve some good fluoro shots.

A Tube Anemone's tentacles glow with a Nightsea Fluorescence Kit. Canon 7D, Canon 60mm, 1/60th, f8, ISO 640.
Do you have a favorite place to go to shoot fluorescence?
Yes, I do! Lembeh, Indonesia has been great! Lembeh Resort has been more than accommodating to me with my search for fluorescing sea creatures. The best thing to me is that every time I come up from a night dive, whether is be 9pm or 2am, they have somebody there greeting me and to help me out of the water. As great as Lembeh is, I also love diving in Monterey Bay, near my home. I have found some fascinating critters in the cold water here.
Do you mainly shoot fluorescence?
No, fluorescence is only a small portion of what I shoot. I love photographing whales and sharks! They both command a high level of respect when you are in their presence. Whatever problems may be happening in life seems to come into perspective after being in the water with these animals and my spirit is content.

This amazing octopus required high ISO and low aperture settings making precise focus critical to create a keeper. Canon 7D, Canon IS 100mm, 1/60th, f7.1, ISO 2000.
Why haven’t we seen more videos from you?
Well, as much as I love to make videos, I have two little boys who have kept me busy these last 5 years. As most parents know, it is a hard balance between giving my sons the time they need, but also showing them that following your passion in life is important. So far, they seem to share the same passion I do about the ocean and all its critters. My oldest son tells me that I have to Skype him from my phone, just so he can see what Daddy has been photographing in the ocean. That excitement makes me feel like I am doing something right!
What is your basic setup?
Hear is a list of what I work with my camera housing:
1. Light & Motion Sola Nightsea. The Sola Nightsea is the best compact & most intense blue light I have used to date. I use 3 to 4 of these lights. If this is not in your budget, Nightsea has other types of torches available.
2. Yellow Barrier filters for your mask and camera. These filters are a must for using blue light. They block out the blue light to allow you to see all the fluorescing colors.
3. Xit 404 flip diopter holder. This diopter holder can hold a filter and a diopter w/filter. They have 5 spots to choose the placement of your filter/diopter. This flip diopter holder allows me to get comparison footage of the subject under normal light and the subject under fluorescence lighting.
4. Xit 404 tripod plate and tripod legs. You want to have some stability if you are taking video. These adjustable legs are the easiest to work with underwater and in the dark. They will also add some weight to your housing, helping take some of the shake out of your video.
5. For photography, you must have Nightsea “excitation” filters for your strobes. This filter limits the amount of light that will be emitted from your strobe to the small wavelength of blue light that is used for fluorescence.

PHOTO SET-UP: A Typical setup for shooting fluorescence photographs will include a Light & Motion Sola Nightsea Light for use as a focus and critter finding light, Yellow Barrier Filters for your lens and dive mask, and Nightsea Excitation Filters for your strobes.
Do you have any tips for beginners wanting to shoot fluorescence?
People often ask me this so here’s a list of things I recommend:
1. Know your camera! I know I am being “Captain Obvious” right now, but you are going to be in the dark and if you don’t know the buttons, wheels, and knobs, you are going to loose the battle every time. You need to learn how to operate your focus, ISO, aperture, and shutter speed by feel and reflex. The light from your camera or lights often make it hard to read or look for these buttons on the housing and by the time you have figured it out, there is a good chance your subject is gone.
2. Buoyancy! Again, “Captain Obvious”. So far I have not seen a sea urchin that fluoresces and we should try to shoot with minimal impact on the reef.
3. Wear the yellow barrier filter on your mask most of the time while you are searching for subjects. You want your eyes to adjust to the dark so that you can see the faint fluorescing colors. Once you find a subject, it may be easier to take the barrier filter off your mask to shoot. Your camera will have a filter so you should be able to see your subject and what it looks like through the viewfinder or the monitor.
4. Get your eyes close to the subjects (without hitting them of course) so that you can see if it fluoresces. Often times I will see a subject fluoresce a certain color and when I begin filming, I notice that they have many other colors I did not see originally. This has to do with the faint light and the distance to our eyes vs. the camera sensor (which is a wonky subject on its own).
5. Check the shallow waters. Some of my best shots have been in 8ft of water. I begin my search from the moment I enter the water. Most of the subjects I find are within 40ft of the surface.
6. Don’t risk the health of the reef, the subject, or yourself for the shot! Live to shoot another night. I have seen many subjects that are just within reach, but one of these factors may have been compromised. Part of me thinks I should risk it, but then my mantra sounds off in my head “we are hear to expose the beauty of the ocean and its creatures, not destroy it.”
- Support these photo tips by purchasing your underwater photography equipment at Backscatter Underwater Photo & Video

Courtesy Backscatter Underwater Video & PhotoBackscatter Underwater Video & Photo
Underwater photographer, Jeffrey Honda, offers insight on how he shoots his amazing underwater fluorescence videos and photos.
What made you get involved with fluorescence photography/videography?
When I first started underwater photography, I had seen a fluorescence picture underwater that I thought was fake. I have always been a fan of forensics and black lights have always fascinated me. Growing up, I must admit that I had phosphorescent stars plastered to the ceiling and black lights with posters all over my walls. When I found out that you could do this under water, it only seemed natural to follow that curiosity.
Who helped you follow that curiosity?
The moment I got my underwater housing for my camera I signed up for Backscatter’s Digital Shootout. They have been pivotal in developing my underwater photography skills and teaching me about underwater photography in general. While traveling with Backscatter, I met Alex Tyrrell, who had just started shooting fluorescence in the Philippines about the same time I was researching about fluorescence photography. He led me to Nightsea, LLC where I met Dr. Charles Mazel, one of the leading marine biologists in fluorescence. Charlie has been key in supporting and encouraging my passion for this style of photography.

Jeff HondaUnderwater fluorescence
In fluorescence photography, subjects absorb blue light and emit colors that are otherwise not visible in normal light. Canon 7D, Canon 60mm, 1/60th, f6.3, ISO 640.
You do both photography and videos of fluorescence, what made you switch to video?
I just didn’t feel photos were doing this style of photography any justice. When you see the reef under fluorescence lighting it’s like you are on some kind of psychotropic drugs (or so I have been told) and it’s difficult to express to someone what you are seeing. I wanted people to see that. The other major reason was my sons. They love watching my videos! They love the vibrant colors. This excitement fuels me to continue this passion.

Courtesy BackscatterA typical fluorescence video set-up will include Light & Motion Sola Nightsea Lights and Yellow Barrier Filters for your lens and dive mask.
VIDEO SET-UP: A typical fluorescence video set-up will include Light & Motion Sola Nightsea Lights and Yellow Barrier Filters for your lens and dive mask.
Is it hard to do fluorescence under water?
Yes, it is difficult. But, so is hitting a baseball, riding a bike, playing a musical instrument, or even learning how to type for some people. It takes practice like anything worth doing. Even though I had help, I didn’t always have help from someone who shot fluorescence. Five years later, there are a lot more people doing it, trying different things and discovering new ways to shoot. So, it is probably a lot easier now and than it was for me. I am also willing to personally help anyone who wants to learn (as long as time and my kids permit it).
In such a competitive market, wouldn’t sharing your secrets put you at a disadvantage?
Well, sharing was the way I was taught growing up and that is the way Backscatter has taught me in this industry. I figure we (most of us) have the same goal of drawing attention to the ocean with all its beauty, its life, and everything it gives us. I just want to be a cog in the machine that helps slow or stop the destruction of the ocean and to help preserve it for future generations. If my photography, videos, or techniques help spark excitement about the ocean like it does with my sons, then that helps me sleep a little better.
If you can only do fluorescence at night, how does this affect your dive trips?
LOL, it has kept my bar tab a lot smaller that’s for sure! Although I love having drinks with my friends and socializing, I love night diving! Usually, in the morning I am just as chipper as my dive buddies who have been drinking most of the night. It’s not entirely true about shooting fluoro only at night. It is possible that you can shoot fluorescence during the day. It’s a little more difficult, but it is possible through camera settings, depth, and hopefully some cloud cover that you can achieve some good fluoro shots.

Jeff HondaUnderwater fluorescence
A Tube Anemone's tentacles glow with a Nightsea Fluorescence Kit. Canon 7D, Canon 60mm, 1/60th, f8, ISO 640.
Do you have a favorite place to go to shoot fluorescence?
Yes, I do! Lembeh, Indonesia has been great! Lembeh Resort has been more than accommodating to me with my search for fluorescing sea creatures. The best thing to me is that every time I come up from a night dive, whether is be 9pm or 2am, they have somebody there greeting me and to help me out of the water. As great as Lembeh is, I also love diving in Monterey Bay, near my home. I have found some fascinating critters in the cold water here.
Do you mainly shoot fluorescence?
No, fluorescence is only a small portion of what I shoot. I love photographing whales and sharks! They both command a high level of respect when you are in their presence. Whatever problems may be happening in life seems to come into perspective after being in the water with these animals and my spirit is content.

Jeff HondaUnderwater fluorescence octopus
This amazing octopus required high ISO and low aperture settings making precise focus critical to create a keeper. Canon 7D, Canon IS 100mm, 1/60th, f7.1, ISO 2000.
Why haven’t we seen more videos from you?
Well, as much as I love to make videos, I have two little boys who have kept me busy these last 5 years. As most parents know, it is a hard balance between giving my sons the time they need, but also showing them that following your passion in life is important. So far, they seem to share the same passion I do about the ocean and all its critters. My oldest son tells me that I have to Skype him from my phone, just so he can see what Daddy has been photographing in the ocean. That excitement makes me feel like I am doing something right!
What is your basic setup?
Hear is a list of what I work with my camera housing:
1. Light & Motion Sola Nightsea. The Sola Nightsea is the best compact & most intense blue light I have used to date. I use 3 to 4 of these lights. If this is not in your budget, Nightsea has other types of torches available.
2. Yellow Barrier filters for your mask and camera. These filters are a must for using blue light. They block out the blue light to allow you to see all the fluorescing colors.
3. Xit 404 flip diopter holder. This diopter holder can hold a filter and a diopter w/filter. They have 5 spots to choose the placement of your filter/diopter. This flip diopter holder allows me to get comparison footage of the subject under normal light and the subject under fluorescence lighting.
4. Xit 404 tripod plate and tripod legs. You want to have some stability if you are taking video. These adjustable legs are the easiest to work with underwater and in the dark. They will also add some weight to your housing, helping take some of the shake out of your video.
5. For photography, you must have Nightsea “excitation” filters for your strobes. This filter limits the amount of light that will be emitted from your strobe to the small wavelength of blue light that is used for fluorescence.

Courtesy BackscatterA typical setup for shooting fluorescence photographs will include a Light & Motion Sola Nightsea Light for use as a focus and critter finding light, Yellow Barrier Filters for your lens and dive mask, and Nightsea Excitation Filters for your strobes.
PHOTO SET-UP: A Typical setup for shooting fluorescence photographs will include a Light & Motion Sola Nightsea Light for use as a focus and critter finding light, Yellow Barrier Filters for your lens and dive mask, and Nightsea Excitation Filters for your strobes.
Do you have any tips for beginners wanting to shoot fluorescence?
People often ask me this so here’s a list of things I recommend:
1. Know your camera! I know I am being “Captain Obvious” right now, but you are going to be in the dark and if you don’t know the buttons, wheels, and knobs, you are going to loose the battle every time. You need to learn how to operate your focus, ISO, aperture, and shutter speed by feel and reflex. The light from your camera or lights often make it hard to read or look for these buttons on the housing and by the time you have figured it out, there is a good chance your subject is gone.
2. Buoyancy! Again, “Captain Obvious”. So far I have not seen a sea urchin that fluoresces and we should try to shoot with minimal impact on the reef.
3. Wear the yellow barrier filter on your mask most of the time while you are searching for subjects. You want your eyes to adjust to the dark so that you can see the faint fluorescing colors. Once you find a subject, it may be easier to take the barrier filter off your mask to shoot. Your camera will have a filter so you should be able to see your subject and what it looks like through the viewfinder or the monitor.
4. Get your eyes close to the subjects (without hitting them of course) so that you can see if it fluoresces. Often times I will see a subject fluoresce a certain color and when I begin filming, I notice that they have many other colors I did not see originally. This has to do with the faint light and the distance to our eyes vs. the camera sensor (which is a wonky subject on its own).
5. Check the shallow waters. Some of my best shots have been in 8ft of water. I begin my search from the moment I enter the water. Most of the subjects I find are within 40ft of the surface.
6. Don’t risk the health of the reef, the subject, or yourself for the shot! Live to shoot another night. I have seen many subjects that are just within reach, but one of these factors may have been compromised. Part of me thinks I should risk it, but then my mantra sounds off in my head “we are hear to expose the beauty of the ocean and its creatures, not destroy it.”

Courtesy Backscatter Underwater Video & PhotoBackscatter Underwater Video & Photo
- Support these photo tips by purchasing your underwater photography equipment at Backscatter Underwater Photo & Video


